Do you have a shed in your yard that you no longer need? Most of us do. It does not only take space but has also become a place for ants and moss to thrive. While you may have your rusty yet trusty tools in that shed, you know that it is high time to tear it down.
We’ll help make it easier for you.
Here are the steps on how to remove an old shed on your property:
Step 1: Plan, Prepare, and Set-Up
Did you know that taking a shed apart is not as easy as you think? Building a shed is much less complicated. When removing an old shed, you need to think about the materials you need and how to dispose of unwanted stuff. But before rushing to demolish, you should first map out the whole process.
Get the Necessary Permits
In general, you do not need any permits to build and demolish a shed, as long as it meets specific requirements:
- It is not elevated 500mm from the ground.
- There is enough distance away from your home and any structure or at least 900mm away.
A shed is categorised under Class 10a, which means it is a non-habitable building like a carport or garage. Since it is a 10a structure, you do not need a legal permit. If its floor area is under 40 square metres and does not have more than 10 square metres of asbestos, you are not required to get a demolition permit.
The WA government recommends that you discuss your upcoming demolition project with your neighbours. It should not adversely affect the health and safety of everyone around the location.
Dispose of Junk and Debris Properly
While you can continue demolishing even with asbestos in the shed, you should still be careful in handling this hazardous material. WA requires a licenced person to remove asbestos that’s more than 10 square metres of bonded or non-friable asbestos.
Aside from asbestos, other potential problems you could run into are:
- Broken glass
- Heavy and immovable items
- Rusty nails and screws
- Splintered wood
It makes sense to have a plan for rubbish disposal. Most homeowners choose the landfill for easy removal of the waste, but you can make your job less of a hassle by hiring the right skip bin size. It’s even possible that the skip bin company will handle your asbestos concerns.

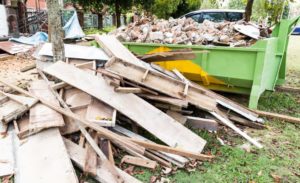
Demolition rubbish.
Have a Budget
How much will a shed demolition cost you? The answer, of course, depends on several factors, including the size of the shed. However, you usually do not need to spend a lot of money, particularly when you already have the required tools and materials. If you’re removing a smaller shed and you don’t need a permit, you’re saving a lot of money, too. You can even hire someone to do the work for you.
Gather the Materials
You will mostly need the following to demolish the shed:
- Adjustable wrench
- Screwdriver
- Hammer
- Rubber mallets
- Roofing shovels
- Impact drivers
- Pliers
- Crowbar
- Chisel
- Circular and reciprocating saws
- Sledgehammer
You may also need a ladder. Make sure that you have personal protective equipment, such as a respirator, dust mask, eye and ear protection, gloves, and a hard hat. If you deal with asbestos and lead paint, you should wear protective gear at all times.
Step 2: Remove Items
By emptying the shed, demolition can become much more manageable. You don’t need to throw everything away. Decide which items should be kept, recycled, and disposed of. You could be keeping certain things in the shed, such as pesticides and other household waste deemed hazardous. Note that you cannot send them to the landfill, so you should dispose of them separately.
You can either donate or recycle the items that you believe can still be put to use. If you do not know anyone who will accept the materials, the best way to get rid of them is to send them to a scrapyard. Sheds have metals, aluminium, copper, and even electronics that you can take to our facility. At Collins Recycling, we will take the unwanted items, so you do not have to mind them again. Plus, we will pay you for your old electronic waste, as well as other materials like copper, brass, aluminium, stainless steel, and batteries.

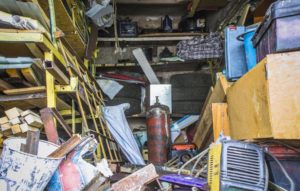
Storage shed junk.
Step 3: Remove All Non-Structural Parts of the Shed
We’re talking about unhinging doors and taking out the windows. Other non-structural parts of the shed include the light fixtures and shelving. If there are other items in the shed, such as materials and tools, remove them, as well.
Step 4: Take the Roof Off
After removing non-structural elements, you can focus on the roof. That way, there is enough strength to hold the frames of the shed together. Begin with the shingles by getting on top of the roof or getting an A-frame ladder. Ensure that you wear proper safety gear and have a ground tarp ready to contain all the pieces. You will need a roofing shovel to pry up the nails and shingles. A square shovel or a flat bar is useful for the same task, as well. You can then peel up the tar paper and the next layer, which will mostly be plywood or Oriented Strand Board (OSB).
For OSB, you can use a burke or flat bar if it is nailed down. Usually, though, you can simply turn to your screwdriver to pull it p. If you find it challenging to get to the hardware, use a circular saw instead.
Get rid of the other parts carefully. There is no rush, so you can take your time to ensure you do not hurt yourself during the task.
Step 5: Remove the Siding
The next step is quite delicate. Siding removal is pretty much similar to the roof’s skip sheathing. You need to pry as close as possible to the fasteners. Again, you don’t need to finish the job right away. Be careful and take enough time, so you do not injure yourself.
You can use a finned-end cat’s paw, which will help pry the siding. Decide whether you will keep or discard the siding. You will need to move slowly and steadily if you wish to reuse the siding.
The shed siding may be interlocked in channel joints, which means you need to remove them without stressing the tongue and groove. Often, the best way is to loosen more than one or two rows at a time so that you can pull the rows free easily. You can use a rubber mallet to remove the siding from the studs. This tool is gentler in knocking the component away so that you can use it again later.
Old sheds can be quite brittle. Watch out for the sides of the shed that the sun hits the most. Those areas are often the weakest, so you should try to reduce the impact on them.

Removing shed wall.
Step 6: Deconstruct the Frame
Are you familiar with the game of Jenga? This next task feels like it. The difference, though, is that you can break the game rules, so you are allowed to start from the top down. You can begin with the roof trusses, which you can pry apart. However, it is better to cut the trusses first, so they are free and the ends are not structurally compromised. You can use a saw to cut. To learn more about roof trusses and other structural steel framing, check out the resources by Steel Frames WA.
Move on to the walls next, and make sure you only work with one wall at a time. We recommend starting the work with the top plate, which you can remove by creating a gap using a hammer. After that, you can pry it open with a flat or burke bar.
Step 7: Get Rid of the Floor
You can skip this step if your shed does not have flooring. However, if it does, you can get your crowbar and remove the planks. You may also use a reciprocating saw, which makes the task easier and faster. However, it may not be suitable for your flooring, especially if you are not comfortable with it.
Once you have removed the floorboards, check if the flooring’s legs have fasteners. If so, you will need to detach the screws.
Some sheds do not have flooring, but there is a concrete slab. You do not need to do anything if you wish to reuse the concrete slab. However, removing concrete may be a lot of work. You will need to break apart the concrete first using a sledgehammer. You can speed up the process when there is someone to help you out who will lift each section using a pry bar. By raising the concrete, you can easily break and fracture it.
And you’re all done! That eyesore of a shed is finally gone, and you can use the space to build a fire pit or whatever you like. Don’t forget to clean up the shed and sort the things you can reuse and recycle. An old shed yields a decent amount of sheet and timber. If you do not need the reusable materials, you can bring them to Collins Recycling or schedule a pickup.


